How to use Motion Storyline
How to create a project
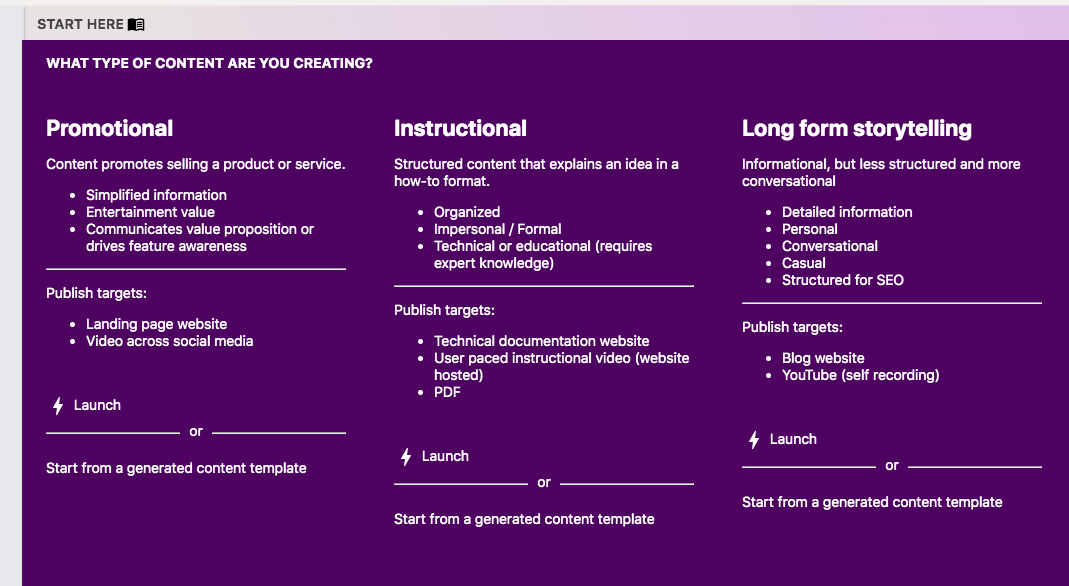
You can click "create project" - the top button on the sidebar. Or basically anywhere on the screen.
If you prefer a bit of fake content to start out with, click the templates icon in the middle of the top bar.
If you prefer a bit of fake content to start out with, click the templates icon in the middle of the top bar.
Customize your project
If you started with pre-populated content, you can go directly into the article you wish to edit. Make any edits to the text you need to, and choose the images by clicking the image and selecting your preference from the media modal. Each text box has a main image to support, and also as many cluster images as you need to show concepts related to that text box. The main image always has hierarchical priority over cluster images. Change any branding options to fit your needs - the main brand color gets changed for the entire project upon update.
Export animation from the builder
Now that our project has our content we can head over to the animation builder tab. A default animation project always opens - click exit at the top to close the editor. You should see your project populate below the launch button. Be sure to click the project a couple of times as the UI is very unstable at the time this was written.
The animation should launch after loading, with the branding, text, and picture updates. The list of available options pops up by clicking export on the right menu.
The animation should launch after loading, with the branding, text, and picture updates. The list of available options pops up by clicking export on the right menu.
Playing the exported animation
Since the "include wrapper" option was checked for the export, a wrapper.html file was created that can be opened in the browser to view the animation. The animation.html will also open in a similar way but will be full screen since it has no context and is designed to be placed into a planned area.
For first time users
Click the Start Here button on the main screen - this will give a quick overview of the opinionated framework for how the system works and begin to define some of the vague and arbitrary aspects of the terminology.